Introduction to ByPic
(and the web IDE)This tutorial starts with the device up, running and connected as shown in fig.1. Follow the steps.
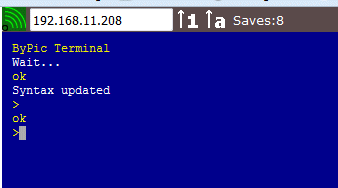
Step 1: Click anywhere in the terminal area and press enter, this will produce an okay as in fig.2
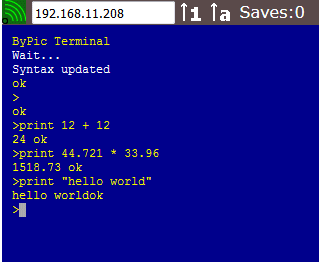
Step 2: Type in the terminal area:
- print 12 + 12
- print 44.721 * 33.96
- print "hello world"
The * is a times and the hello world MUST have double quotes at the start and end.
Variables
- Integer variables a,b fred, myvariable16 another one
- Floating variables a#,b#, myfloat12#
- String variables a$,b$, my_sting$
Step 3: Enter dim a,f#,s$ in the terminal area then press enter
That has created three variables of three different types, integer, floating point and string.
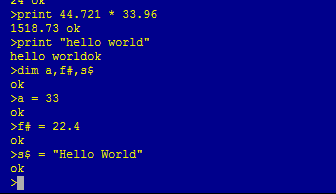
Step 4: Enter:
- a = 33
- f# = 22.4
- s$ = "Hello World"
You have placed some values in those variables
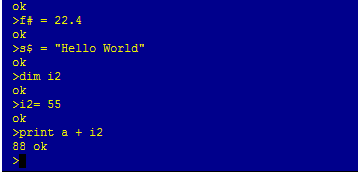
Step 5: Enter:
- dim i2
- i2 = 55
- print a + i2
We can use variables in the same way as numbers or strings. Try doing the same but using a string variable, for example:
- dim b$
- b$ = "fred"
- print a$ + c$
Programming
dim j
for j = 1 to 5
print "hello Me"
next
endf
Step 6: Type the above into the text editor (see fig 7) or copy and paste it. Make sure there is a blank line after the endf
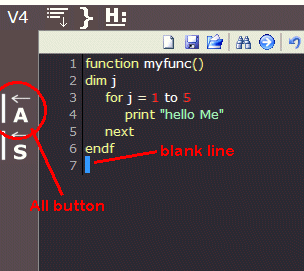
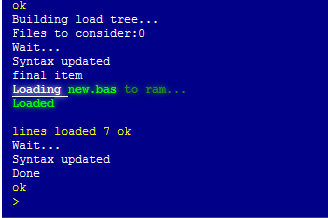
Step 7: Use the |A icon to send this text over to the device, when complete you will see that the terminal has 'Done' in its contents (fig. 8)
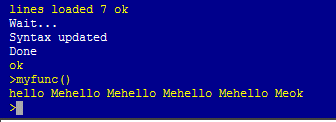
Step 8: type func() This will run the function just created
This would be better if the text was in a vertical line, we can do this by placing a carriage return and line feed on the end of the text
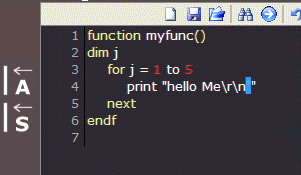
Step 9: Add \r\n to the en of the text as shown in fig. 10
Step 10: Press |A to send the text over to the device again
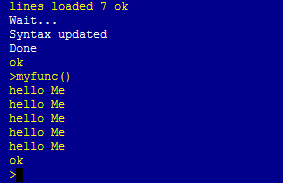
Step 11: type myfunc() to run the function again