I2CN20 RTC Power
At his point in time there is no wemos (arduino) library, just micropython, why not install micropython on the wemos and give it a go
This is designed a a Wemos D1 shield. On board is a real time alarm clock and a MOSFET switch that when combined enable the Wemos to be shut down completely for a set period of time, thus giving a significant power saving.

The block diagram shows that the alarm output controls the power to all devices, there is no power consumed when the switch is off - not even to the clock as the clock battery supplies the clock.
The Wemos during the shutdown period is completely off, consuming zero power, not even standby power. The only power consumed is by the RTC that is purposely designed to run for long periods on a small back up battery.
- Can be set for repeated alarm times 1 second, 1 minute, 1 hour, day month or year
- Can be set to come on at a specific time (years in advance)
- Jumper to override the alarm for permanent on while testing
- Maximum continuous current 1.1A
The device works on I2C, address 104 (0x68). Two pins are needed for this and most other devices use the ones shown here. 5 is SCL and 4 is SDA. For timed operation power is supplied via the power in pins as shown. This power is switched on and off by the alarm output from the RTC. The switched power is fed to the wemos via the 5V pin.
If there are other devices that need power it can be supplied through the auxiliary pins, this power will also be switched by the alarm.
If the USB supply is used then the alarm switch will have no effect as power is continuously supplied by the USB port. The jumper will also switch on the supply regardless of the alarm condition. This may also be needed for the initial start, depending on what state the alarm was left in at shutdown.
The only pins used on the ESP8266 are the I2C pins GPIO 4 and 5
How it Works
The RTC has a single output pin, this can either be set by the alarm or by setting a register bit using I2C. It has two conditions high impedance and low. In the high impedance state the power is off and in the low state the power is on. This pin is called OUT
- At boot up set the OUT pin to Low, this will maintain power to the wemos when reset
- Set an alarm for sometime in the future using the registers
- Set the AFE and ABE flags (on the RTC)
- Set the OUT pin to high
As soon as the OUT pin goes high power will be cut to the wemos. When the alarm activates at some point in the future the OUT pin will go low and power will be supplied to the wemos. The firmware on the wemos can do whatever it has to do, set the alarm and power down again.
Points to watch out for
- The SQWE flag should always be 0
- Setting the out pin via a register (thus i2c) only works when the AFE and ABE flags are clear
- After an alarm goes off it must be reset by reading register 15, if AFE and ABE are set this will cause OUT to go high, so clear these first if power is still needed
- After setting the alarm registers, set AFE and ABE, the OUT will still be low, so set this to high to remove the power. The alarm will set it low when the time comes.
- When applying power the device needs to be activated by shorting the override ON for a brief time. After that the Alarm can take control of the power.
Using
Simple demo (demo.py)
Download and unzip the library file, the zip contains 5 files, download these to the ESP8266. Some files will not be needed for the first demo.py file.
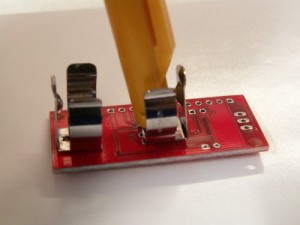
Install the battery, restart and set the time by:
(Thursday, March 8th 4:15 PM)
>>> demo.d.clock((2018,3,8,16,15,0,4,)) # y,m,d,h,m,s,day of week (mon=0)
Note the brackets and the extra comma, required when specifying a tuple
This can be checked to see if it okay by:
>>> demo.d.clock(format=1)
Note the time is set, remove the USB and power from the power pins
Briefly short out the 'ON' jumper the LED will illuminate for about 2 seconds. Now wait and after a minute the led will illuminate again for 2 seconds, this will continue.
demo2.py
This will send you an email of your outside IP address which is useful if you have an open port on a dynamic IP address.
In order to send an email simply, a push service is required. For https://www.pushingbox.com was used. Roughly this is what to do:
- Set up an email pushing box service, this is where you put the email address
- Set up a scenario using that service and you will be given an ID number
- In the scenario the message body is At $time$ The outside ip address is $ip$
- Edit demo2.py and put in your pushingbox id and wifi credentials
- Edit boot.py, rem out the import and main for demo and un-rem for demo2
- Make sure the edited demo2 and boot are saved back to the ESP8266
- Remove the usb and power from the power pins as above.
MicroPython Library
boot.py
When booting up it is important to be able to power on in the absence of any firmware controlling the RTX and so at this point the m41t81 library is installed and the OUT pin can then be controlled to be low to maintain power. The alarm will also keep the pin low until reset but if there has not been an alarm but the shorting pins used then this is needed.
A special feature of the M41T81 is that it maintains the last date and time that the power went down, this could be useful. To connect the output registers to the clock again the halt bit is cleared, this is done using halt_clear()
i2cn20.py
This is mostly a connection to the m41t81 library, however the time formats for the built in ESP8266 RTC and the Python time are slightly different:
#   Python format:   y,m,day,h,m,s,dow,yearday
#   ESP8266 format:  y,m,day,weekday,h,m,s,ms
Also to use the time() function that returns the number of seconds from the Epoch the built in RTC needs setting. This is done from the m41t81 clock as it is more accurate and has a battery back up. The function clock(options) is used for getting and setting time.
offuntil() and offfor() illustrate how to set the alarm and power down.
demo.py
This is a simple demonstration that is called from boot which powers up the device for 2 seconds and then shuts it down for 1 minute.